Onigiri has all the amenities for great trail food. Here’s how to make one for your next hike.
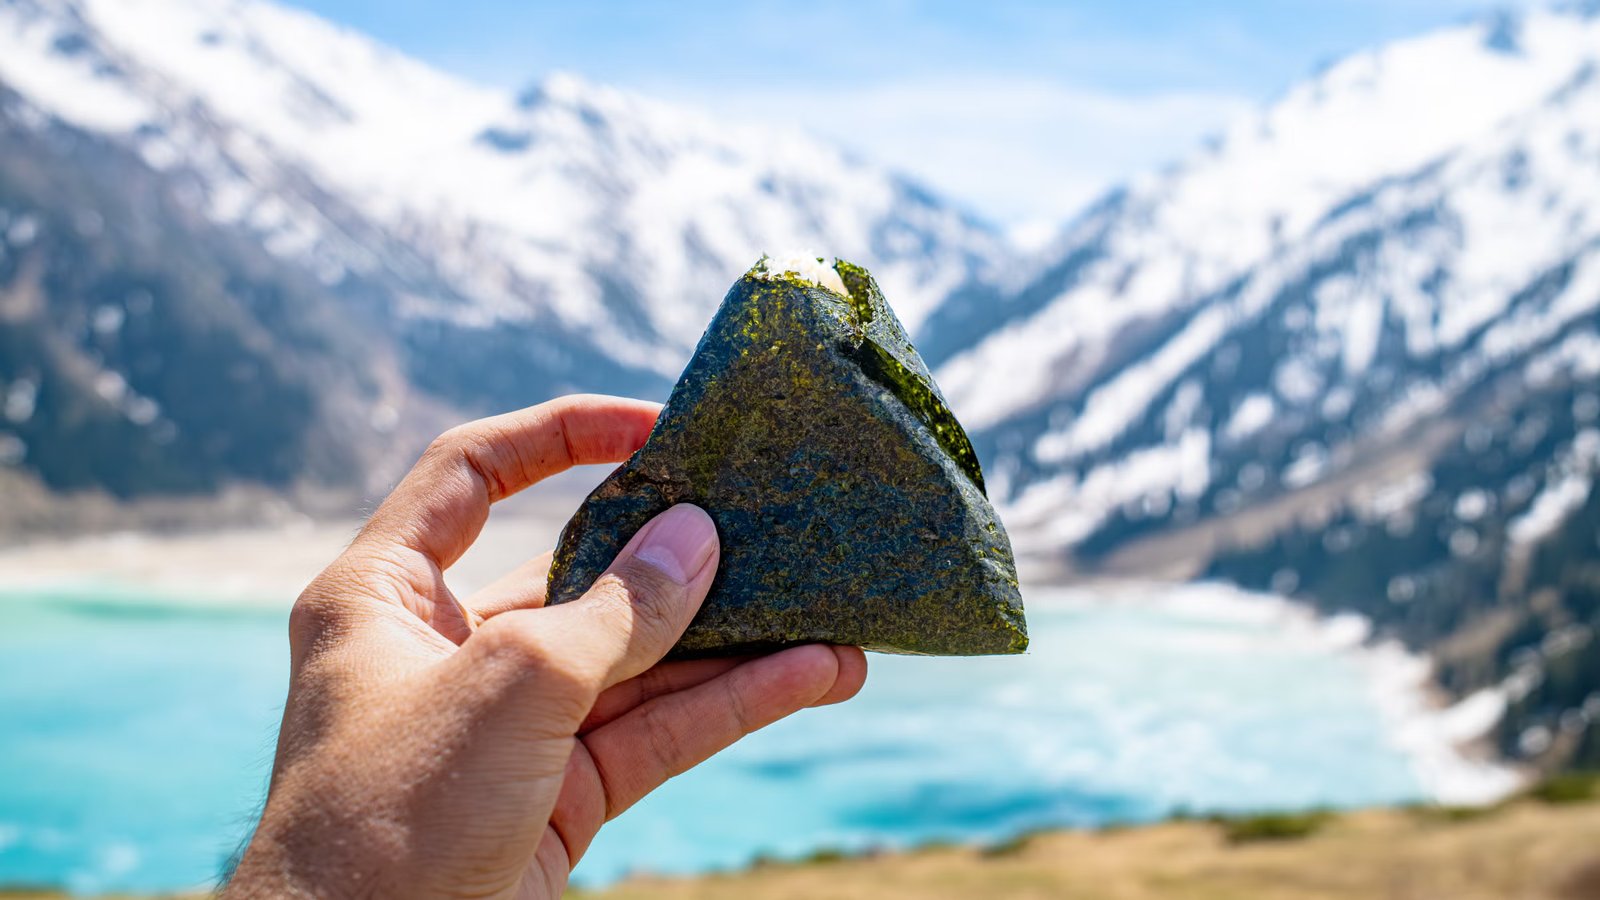
(Photo: Ploykar via Getty Images)
Published on June 28, 2026 08:05 am
For a meal to meet a traveler’s needs, it needs to check a few boxes: It must be packable and easy to eat on the go. It cannot spoil easily and should remain delicious at ambient temperatures. And it has to survive when placed between layers and water bottles inside the backpack. Good nutritional value and strong calorie-weight ratio are its advantages, and of course, it must be delicious.
Only a handful of foods meet all of these requirements, and as a result, most hikers eat the same few things along the way. But a person can only eat so many peanut butter and jelly sandwiches, which often end up crushed and soggy in the backpack. Bars, trail mix and wraps don’t always satisfy a craving Real Food on the road. For the past few years, I’ve been on the lookout for portable foods that offer more satisfying flavors and textures. And after discovering onigiri, I will probably never eat PB&J again.
For the uninitiated, onigiri is a Japanese lunch or snack food made from steamed rice shaped into balls and filled with any number of delicious ingredients. In Japan, they are widely available in convenience stores and popular trail foods. Onigiri is portable, easy to make and customizable with any ingredients you like – in other words, the perfect hiking lunch. Traditional fillings include tuna and mayo, pickled plum (umeboshi), and roe. The balls are often wrapped in nori and shaped into a triangle. But with homemade onigiri, the filling possibilities are endless. the internet is pervasive Onigiri RecipeMany of which make great snacks for hiking. Stick with the classics, or experiment with what you can find at your grocery store. Here are some ideas for onigiri fillings for hiking.
- Canned or Smoked Salmon and Sriracha Mayo
- Canned Tuna and Mayo
- Avocado and Ginger
- Mushrooms and Miso
- Egg and Bacon
- Summer Sausage and Cheese
- Shredded Chicken or Pork and Barbecue Sauce
- Tofu and Soy Sauce
How to make Onigiri
Onigiri is best for day trips, as cooked rice can grow bacteria after only a few hours. Make these in the morning for best results, or refrigerate up to two days before your trip.
Material
- Japanese short-grain rice (sometimes sold as sushi rice)*
- Salt
- Filling of your choice
- 1 to 2 sheets of nori (optional)
- furikake or sesame seeds (optional)
*Do not substitute any other type of rice here – other grain sizes will not provide the stickiness and texture needed to form balls.
- Prepare rice according to package directions. (One cup of dry rice will make about five standard-sized onigiri.)
- While the rice is cooking, prepare your filling. be creative! Cancel.
- If desired, prepare nori by cutting a sheet into three parts.
- Make onigiri. you can use one triangular mold Or shape balls by hand (triangles are traditional, but any shape will do). To do this by hand, wet your hands with salted water to prevent the rice from sticking to you. Take about ⅓ cup of hot rice in your palm. Using a spoon or your fingers, make an indent for your filling. Add 1 or 2 teaspoons of filling into the indent. Cover the filling with another spoonful of rice, then use your hands to pack the rice into a ball, sealing the filling inside. Shape your hands into a triangle, or whatever shape you like.
- If desired, coat the outside edge of your rice balls with sesame seeds or furikake (rice seasoning).
- If you’re going to eat your onigiri right away, wrap it in a sheet of nori. However, wrapping it ahead of time will make the nori soggy and most people prefer it crispier. For crispier nori, pack it separately.
- Wrap onigiri in plastic wrap for marks. (If you want that classic convenience store wrap that keeps the nori crisp, you can buy Special Onigiri Wrapper Online.) When ready to eat, wrap the nori around the onigiri and enjoy.