


“>
Nov 2, 2026 : The EditorsPacific Crest Trail
Andrew Skurka’s 2027 Pacific Crest Trail Backpacking Gear List
Get new posts by email. Unsubscribe anytime.
I first hiked the Pacific Crest Trail in 2006, and I went through the High Sierra in late June, early July. I was wearing running shorts, like short running shorts, a T-shirt, a visor. I had like a 40-liter backpack.
I had no way to protect myself from bugs, no way to protect myself from sun. I’ve learned a lot in the intervening years. I am fortunate enough to backpack in the High Sierra basically every year.
You can’t go wrong with the High Sierra. Bang for your buck, it’s like one of the greatest places in the world. You have phenomenal scenery, wonderful bluebird skies for the most part during the summer, majestic crystal-clear lakes, some biting insects, but it’s like a short-lived season, blissful off-trail travel, a lot to love.
If you’re planning on hiking the Pacific Crest Trail in 2027, this gear list should really help you out. It will also be relevant towards any of the other trips that you might do in the High Sierra. If you’re going to do, say, a section on the John Muir Trail, if you’re going to do the Sierra High Route, Yosemite High Route, Kings Canyon High Basin Route, and if you’re just going to do a weekend out of Fallen Leaf Meadows or out of Lodgepole or out of, say, Piute Pass.
I would make some slight adjustments to this gear list based on exactly what month I’d be up there. So I’m going to give you a kit that works between the months of like June and September. I also would make a few tweaks if I was a female instead of a male, and I would also make a few tweaks if I had a last-minute forecast that was notably warmer and drier or cooler and wetter than the average.
Today, we’re going to cover the entire kit, starting with what I would wear, and then we’ll go to inside my backpack. We’ll talk about my sleep system, shelter, food storage, and my cook system.
Hi, I’m Andrew Skurka. I’m a former thru-hiker and was the first person to do the Sea-to-Sea Route, the Great Western Loop, and the Alaska-Yukon Expedition. I’ve also, in the Sierra, hiked the John Muir Trail at least once. The Sierra High Route, I put together the Yosemite High Route and the Kings Canyon High Basin Route.
I guide trips there every single year. Typically, we’re there during late July and August. This is part of a weekly video series that I do with The Trek.
We drop a new video every Monday at noon Mountain Time. One announcement before we get started. We’re doing a live event with Backpacker Radio on December 5th, Saturday, at Skylark Lounge in Denver.
If you’re a resident of the Denver metro area, you can get tickets here.
The Go-Suit: What I Wear on the Pacific Crest Trail
To start, let’s talk about the go-suit. The go-suit is defined as the things that I’m going to be wearing or carrying directly on my body all day long. It doesn’t matter what the conditions are.
Sun Hoodie and Hat
Let me just start with the shirt. I’m going to be wearing a long-sleeve hoodie, and I’m going to be wearing a ball cap.
This hoodie has been permethrin-treated, so it’ll keep the biting insects, particularly the mosquitoes, off of me during peak season, which in the Sierra, usually peak mosquito season, it’ll start maybe like middle of June and it’s starting to wind down after about mid-July. Usually by August 1st, there are almost no mosquitoes in the Sierra.
The timing and the mosquito season definitely varies, though, with the winter snowpack, so whenever you’re watching this, make sure to get an update on what the winter has been and what sort of the forecast is for when the mosquitoes will hatch and how bad they might be.
If I was starting the Pacific Crest Trail in Mexico, you basically would not have changed your shirt. You would want almost an identical shirt for that section where you’re dealing with a lot of sun exposure, and also at that time of the year, like in April, you’re gonna be dealing with some cooler temperatures, so you would actually appreciate the warmth of a long sleeve.
It would not need to be permethrin-treated because you don’t have a biting insect issue in that part of the trail, but you would appreciate having a long sleeve for the sun protection.
The hood also gives you sun protection, and also at that time of the year, you might be starting in March or April, you might want a little bit of warmth that the long sleeve and that the hood provides.
Hiking Shorts and Pants
For bottoms, okay, so I have on a pair of shorts, and shorts, they’re just better than pants. Better range of motion, better ventilation, and if I can get away with shorts, I’m gonna wear shorts.
I do, though, always carry with me a pair of pants, and the pants, there are like a couple of different scenarios here. So if I was hiking the Pacific Crest Trail, absolutely, I’d be trying to hike as many miles as I could in shorts, but I still would bring pants because there are times where I need that extra sun protection, or if I’m traveling or if I’m hiking, if I’m on the trail during bug season, then you definitely would want the biting resistance of a full pair of pants.
The last thing to consider would be if you are in the High Sierra early in the season when there’s still snow lingering on the ground. Again, you’re going to need pants because the snow is super reflective, and you’ll get scorched if you just are wearing shorts.
I remember, you hear about how intense the sun is in the West, but if you’re not from here, you might not have ever experienced it.
The first weekend I ever was in Colorado, this was back in 2003, I went backpacking up at the Indian Peaks. Everyone had told me, yeah, you know, the sun is a lot more intense here than it was in North Carolina where I was going to school at the time, and I didn’t believe them, so I went out in my normal Appalachian Trail outfit of short shorts and a T-shirt.
And when I got back into the office on Monday morning, I realized that the back of my hamstrings actually were blistered because I had gotten sunburned so badly on my hamstrings, remarkably.
So the sun out here is real. You’re going to want a pair of pants, even if you want to do the bulk of your miles in shorts.
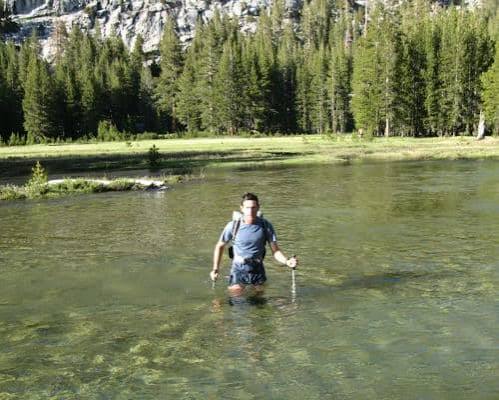

“Creek crossings in the High Sierra warrant your attention. The hazard is caused by a unique set of circumstances: Significant wintertime snowfall, Arrival of hot and sunny weather in late-spring, Steep gradients, Few bridges, Recreational use miles downstream of headwaters, and, Non-porous granite substrate.” (Skurka)
Sungloves and Sunglasses
Another item that’s included in my go-suit would be a pair of sungloves. This is one of those items that I added in the last 10 years, after I did the bulk of my thru-hikes, and I remember wearing, using them for the first time and just thinking like, oh wow, where have you been my entire life?
They’re great for added sun protection. They provide some abrasion resistance against my trekking poles. If you’re doing any off-trail travel, you can grab onto sharp rocks or use veggie belays without risk of cutting up your hands.
These sungloves that I have, this is actually a pair of deerskin gloves made by Milwaukee that I bought at my local Home Depot, because I find them to be, they’re less expensive, but more importantly, a lot more durable than sunglove-specific products like these Glacier Gloves.
But these are really nice. They breathe better, they’re lighter, they’re just more comfortable to wear, but they don’t last that long. Maybe give them like a month before you kind of burn through the faux leather palm.
I’m wearing a hat, of course, and I find that a ball cap works really well with the hood. You could go in different directions with this, like you could go with like a collared shirt and like a wider-brimmed hat. It’s a little bit of a personal preference.
I’ve always gone with the ball cap because in addition to it fitting well with a hoodie, it also fits well with anything else that you have a hood. So particularly like a rain jacket or a puffy jacket, you can just continue to wear your ball cap.
So we have a pair of sunglasses. This is a critical item, like must-have for anywhere along the Pacific Crest Trail. There’s just lots of sun.
If you’re going up through the High Sierra early as a thru-hiker, you’re also going to be encountering sections that are still snowbound.
If we want to have a really dorky conversation, we could talk about the VLT ratings of your sunglasses. That’s visible light transmission.
If I were going up through the High Sierra early in the season, when there’s still a lot of snow, I actually might even swap out my sunglasses for a pair of glacier goggles for that time of the year. Glacier goggles have like a 5% visible light transmission, whereas a normal like all-purpose pair of sunglasses, you’re looking at maybe like an 8% or 10% lower bound.
You could also go with the photochromic lenses or the transition lenses, which give you a little bit more versatility. You can wear them in mixed light conditions as well as even in the forest because the lens will sort of brighten up for you.
Trail-Running Shoes
Okay, so for footwear, I’m going to go with a breathable trail-running shoe.
This is the La Sportiva Bushido. It’s my favorite for the Sierra, but I do a lot of like off-trail travel, like hard stuff in the Sierra. This is not probably what I would use for a good A-grade or grade-A trail like the Pacific Crest Trail.
I would be looking at a shoe that has more cushioning, that maybe doesn’t quite have the narrower last of the Bushido. Your classics would be an Altra Lone Peak, maybe a Brooks Cascadia, maybe some of the, what’s that other brand that does the, oh, maybe a pair of Topos.
We might do a future video on how to select footwear for your trip.
I would say generally, if you’re going to be on trail, again, look for something that has some, that it’s comfortable to wear. So it’s cushioned, has a durable outsole because you’re going to be putting a lot of miles on it, and just make sure that it’s very comfortable for you and your natural gait.
Footwear is tough. Footwear is really personalized.
If you find another male who weighs about 160, 165 pounds, I can probably give them the size medium shirt and it will fit them reasonably well and they would be just fine with it.
But if I give them my favorite pair of shoes like this La Sportiva Bushido, even though they might be size 11 and a half, it might not at all work for them.
So shoes are super personal. Make sure to get something that works for you. Don’t just base your decision off of, you know, like some best Pacific Crest Trail backpacking shoes of 2027 video.
Hiking Socks and Gaiters
Your shoes should be considered a system along with your socks.
What I would recommend doing in the Sierra is that you’re going to have, for most times of the year, it works best to have two pairs of identical socks. So you can call it like hiking pair A and hiking pair B.
And what you’re going to be doing is you’re going to be wearing pair A and then like you’re going to wear them for one full day.
Day two, you put on hiking socks B and you take hiking socks A and you wash them in a creek, no soap, just get that dirt and dust out of the sock just by agitating it in a creek or a lake.
Do consider when you do that, like just that there are other people using the wilderness. So you do it in a place that’s appropriate for having a little bit of your like sock grit back in the water source.
And then once you have your now clean pair of sock A or hiking socks A, you’re going to put these on the back of your backpack and you’re going to let them air-dry on your pack.
I can guarantee you that if you wash them even as late as lunchtime, they will be dry by the end of the day. And then when you get into camp, you can put on your dry, clean sock A and then day four in the morning, you’d wash pair B and you just keep doing the cycle.
So you may have noticed earlier, I do like to wear gaiters. These are the Simblissity LevaGaiters. They remarkably, they sit nicely on the shoe, even without an instep strap.
An instep strap is one of the, it basically goes underneath the shoe and with most trail-running shoes, there’s not an actual instep unlike a boot. So you end up basically stepping on the cord or the strap all the time and that leads to a really short lifespan.
So the Simblissity LevaGaiter, I find that I’ve always worn gaiters. I find that they help keep a lot of stuff out of the shoe. So it prevents things from going in the tops. So particularly like any kind of pebbles, forest debris, like leaves and sticks.
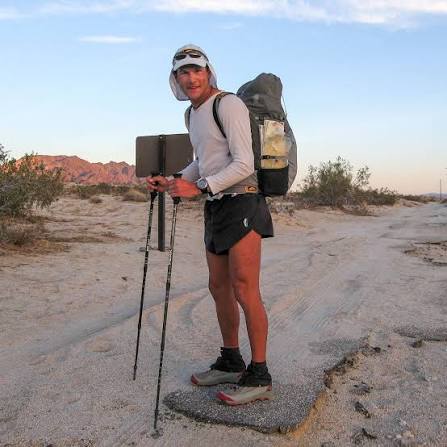

“#TBT to a 70-mile stretch across #JoshuaTreeNationalPark with no natural water with the Pacific Crest Trail.” (Skurka)
Trekking Poles and GPS Watch
Two final items that are part of my go-suit, which again is the category of items I use to describe everything that I’m wearing all the time.
A pair of trekking poles. These are the Black Diamond Alpine Carbon Cork.
You can get lighter poles, but man, the durability of these has just proven to be outstanding. So these poles would, short of user error, these poles will definitely go the distance on the Pacific Crest Trail and they’re also robust enough for any of the high routes.
And then the last item, I do like to wear a watch. This is a very old watch. This is a Suunto Ambit3 Peak. It goes back to 2013.
There are modern GPS watches out there. Any of your Garmins, for example. It’s not necessary to have a GPS watch.
In the Sierra, there are two really useful features of a watch. One is that it just tells time and that’s really helpful to be able to dead reckon as you’re navigating on the Pacific Crest Trail.
The other feature that’s really helpful to have on a watch in the High Sierra is an altimeter.
And if you know your altimeter, then you can play Battleship on your map. So for example, if you’re at 9,800 feet according to your watch and you’re at a trail junction, that will really limit the number of places you can be on your map.
Of course, a lot of you are probably watching this and going like, oh, Andrew’s old. Who still looks at paper maps and plays Battleship with their altimeter? Because everyone nowadays is using FarOut on their phones.
Choosing a Backpack for the Pacific Crest Trail
So that’s the go-suit. Now let’s talk about everything that I would keep inside my backpack either all the time or at least some of the time.
This particular pack, this is the Seek Outside Flight. I’ve been using it for multiple seasons and it just, I really like it. It works for me, but there are at least 10, 15 other backpacks out there that have a very similar feature set.
They all weigh in this neighborhood of like two to three pounds. They’re made out of very durable exterior fabric. They have side pockets, like big, nice side pockets, and they also have hip belt pockets. And then finally your mesh or solid-material front pouch.
The ideal volume for a Pacific Crest Trail backpack is going to be in the neighborhood of, I’m going to say 50 liters plus or minus 15.
So if you are like a hardcore thru-hiker, super-ultralighter, maybe you can go down to 35 liters. If you are walking slower and you have quite a few creature comforts and you’re not planning on doing a lot of resupplying during your hike through the High Sierra, maybe you need to be up more towards that 65-liter range.
50, 55 liters, that’s probably the sweet spot for most people.
If you visit the online communities like Reddit Ultralight, you will find lengthy discussions about pack fabrics.
I couldn’t tell you much about modern pack fabrics because the pack fabrics that we had 20 years ago lasted for an entire thru-hike of seven, eight, nine, 11 months. So the modern fabrics are at least as good, probably even better.
I do think it’s worth having a backpack made out of durable materials.
And like even like this mesh pouch, this is the first thing that’s going to get ripped up. And it’s the same thing with the elasticized mesh side pockets. These are the areas that are on the backpack that are actually like vulnerable to the most amount of abrasion.
So I would like this to be like, I’m very happy that these water bottle pockets are made out of the same exterior pack fabric. I wish that this mesh pocket were also made out of it. I think all of these end up being in the neighborhood of like 200-denier-ish.
And this pack and many of the others that fall into this category will last you your Pacific Crest Trail thru-hike, probably, and then some.
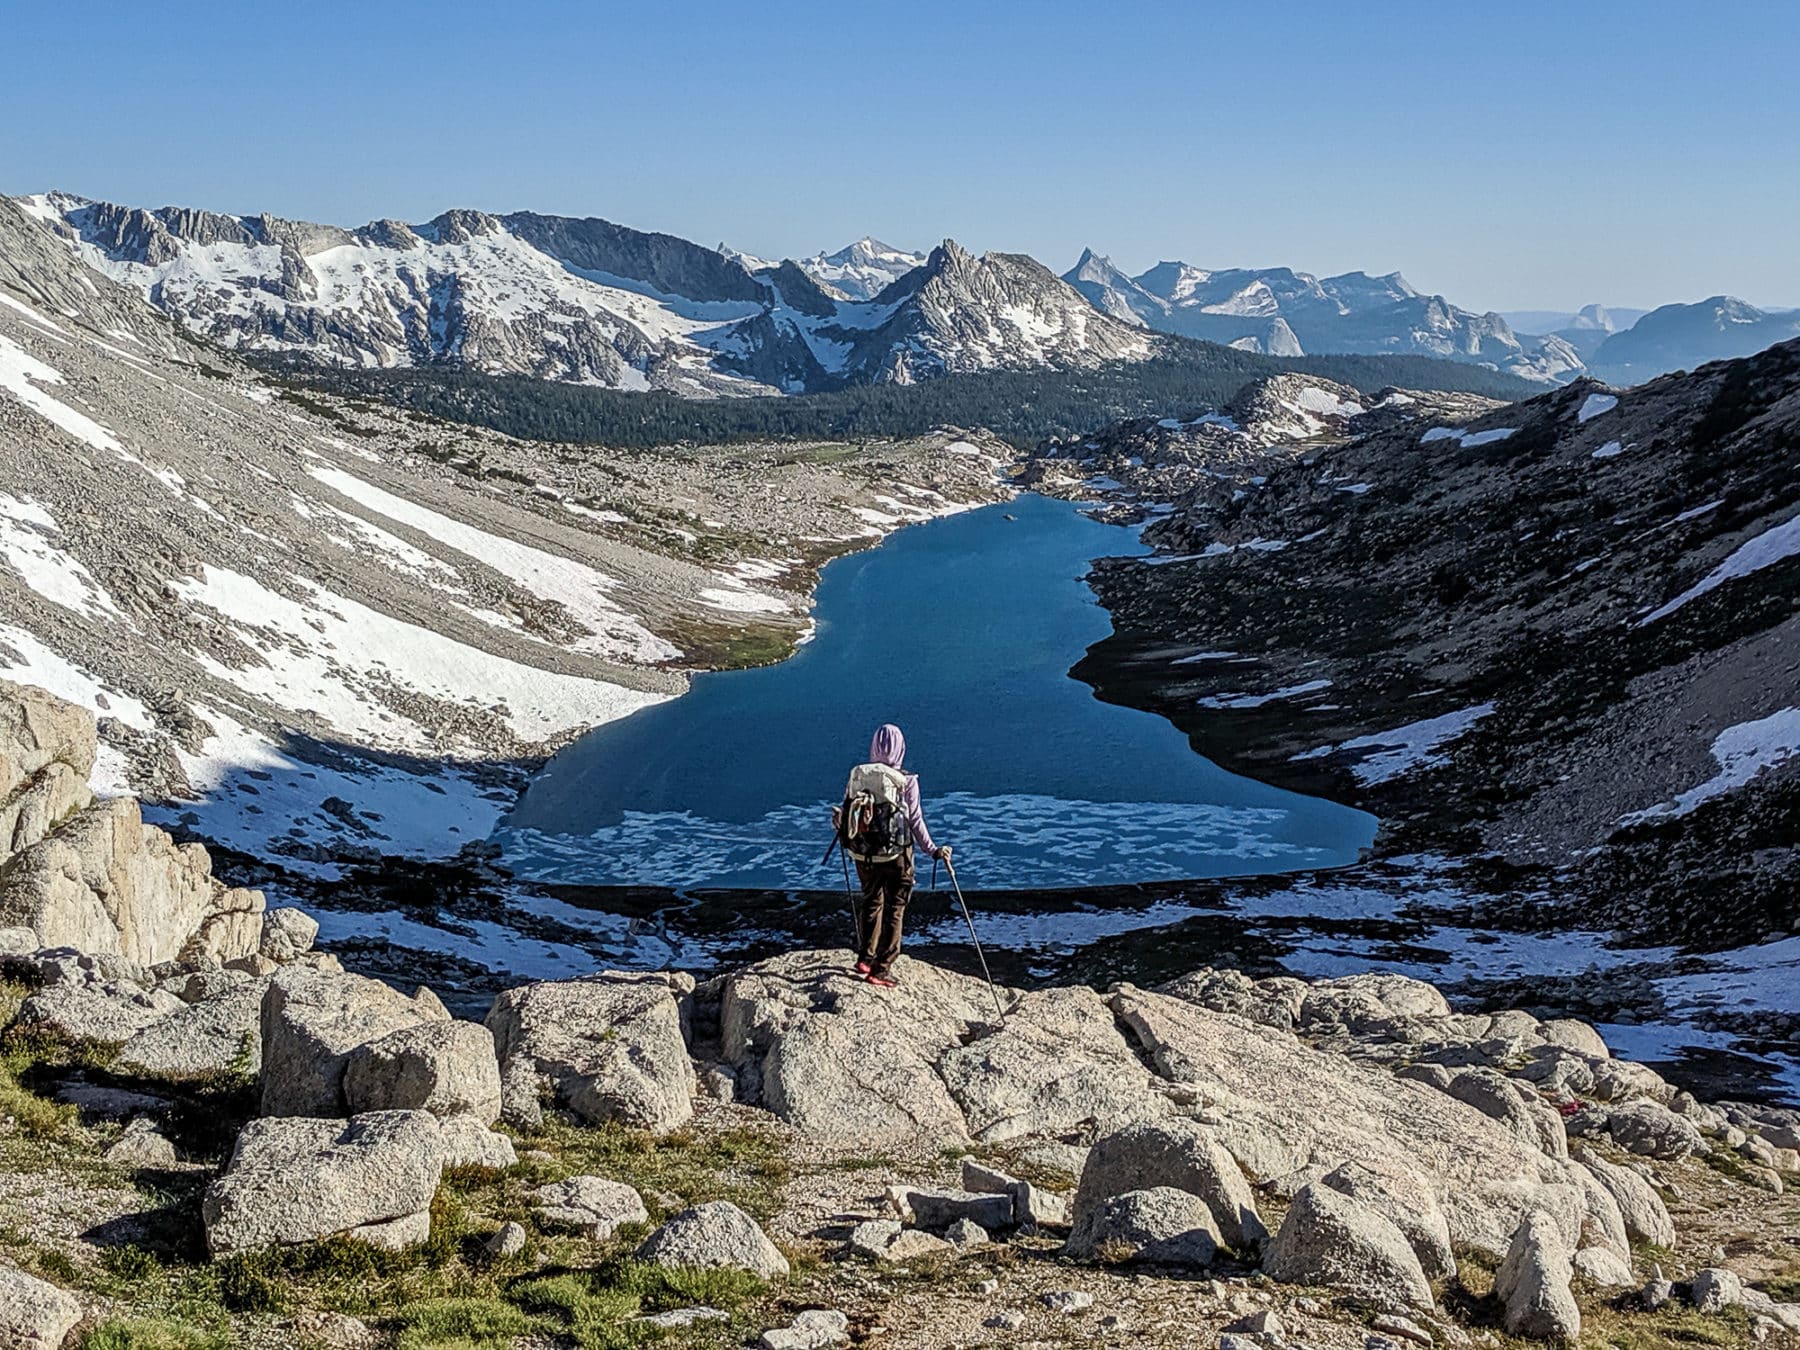

Overlooking Roosevelt Lake, on the descent from Don’t Be A Smart Pass
Waterproofing Your Backpack With Trash Compactor Bags
Some pack fabrics are described as waterproof. And I’m specifically thinking of any of the pack fabrics that are laminate with DCF or Dyneema Composite Fabric.
If you have a waterproof pack fabric, that certainly provides a lot of water resistance. I’d be skeptical in not having a more reliable way to waterproof your things, even if you have a pack made out of waterproof fabric.
Those fabrics, especially with the use that a thru-hiker would put on a pack fabric, I wouldn’t count on that pack fabric maintaining its waterproofness long term.
So my solution for waterproofing my things is that I take with me a trash compactor bag. So here it is here. This is made out of two-and-a-half-mil plastic, which is a little bit more, it’s a little bit thicker than like the ultralight pack liners that you’ll see.
The reason I like the pack liners is that they are reliably waterproof. They’re very easy to replace. So you can just drop some in your resupply boxes.
They’re lightweight, and they’re inexpensive. And long term, even after you’ve put thousands of miles on your backpack, they will keep your things dry.
Typically, I’ll carry two pack liners.
The first one I have closed off about right here. So in that lower pack liner, I have all the things that I am going to need for camp. So my sleeping bag, my sleeping pad, my pillow, my sleeping socks.
And then this upper pack liner would be discretionary. I’m basically going to only use it if it’s pretty evident that I’m going to get rained on.
At that point, before I start getting rained on, I would stop for 10 minutes, pull everything out of my backpack that isn’t protected, line the top of my backpack with my second pack liner, and then seal it up.
And that way I’m rain-ready.
Extra Clothing and Rain Gear for the PCT
Towards the top of my pack, I keep all of my extra clothing. And this extra clothing you can put into two categories.
One category is going to be like environmental protection. So I’m mostly thinking about rain, maybe snow on some other types of trips.
Rain Jacket and Rain Pants
So my rain gear system for the Pacific Crest Trail, it’s going to start with a rain jacket and pants.
It typically does not rain very often or very hard on the Pacific Crest Trail, especially as you get into the peak summer months. So like July, August, September, it doesn’t rain a lot until it does.
Almost all of the rain that you’ll see in the summertime, it’s a monsoonal event. It’s very predictable. You’ll see it in the forecast that there’s some chance of precip.
So maybe it’s a 10% chance of precip. Maybe it’s a 20% chance of precip. Maybe it’s a 40% chance of precip.
And what will happen, you’ll wake up in the morning and there’ll be a bluebird. There’ll be total bluebird sky, not a cloud in the sky. It’s beautiful.
And then by like 10 a.m., you’ll notice that the sky is developing some puffy clouds. And then maybe by like 11, they’re getting like thicker and more and like more of the sky is cloudy.
And then by like noon, you’re starting to get some kind of scary-looking ones, maybe some kind of like violet or like dark blue, maybe some like dark gray.
And then by like one o’clock, you’re starting to see in the distance, you’re starting to see anvil caps on these thunderclouds.
And that’s the sort of day when you actually do need your rain gear.
I have with me a rain jacket and I have with me a pair of rain pants. And I think just because you’re probably not going to see a lot of rain, you can get away typically with some lighter-weight rain gear.
This is the Enlightened Equipment Visp jacket and the matching pants. I think this whole suit together weighs in the neighborhood of maybe like 12 ounces.
If I was going on a shorter trip, so like anything inside of five days, maybe even a week, I would look at the forecast. And if there was no chance of precip on any of those days, I actually would just leave the pants at home. I would leave them in my car.
This would be a last-minute decision. So I would just have a rain jacket. I think it’s poor form to be backpacking without some rain gear.
Rain Mitts and Mid-Layer Fleece
I also would carry with me some rain mitts.
I personally struggle with, when it rains in the High Sierra or along the Pacific Crest Trail, the temperature also tends to drop a lot.
So I would have a rain mitt system consisting of a liner glove and then a rain mitt. And this would at least give me a fighting chance of keeping my hands functional when the temperatures really drop related to those rainstorms.
Last piece of clothing that I would consider to be part of this environmental protection category is going to be a mid-layer fleece.
Having a mid-layer is really nice to wear for, in two instances. One is if you’re on like a, it’s early in the morning, it’s cold and you want an active layer that provides a little bit of warmth and it feels comfortable to move in.
It’s really good for that.
The other situation it works really well is that you can wear it or layer underneath your rain gear and it will provide you just like a little bit of a buffer between that cold rain on the exterior of your rain jacket and your body.
Puffy Jacket and Buff
The other category of clothing that I would take with me would be, I’ll call it like the stop or rest category.
And for the High Sierra, typically I’m just going to bring, I’m going to bring a puffy jacket.
This is the, I don’t remember which model it is. This is made by Katabatic.
It has about three ounces of premium down-fill loft. And for the High Sierra and the Pacific Crest Trail, down fill is totally the way to go.
It gets much better lifespan than synthetic. You can usually keep it dry. And if it does happen to get wet, you can usually get it dry like the next time you get sunshine, which might be later that day. And certainly usually the next day.
Last thing really in this category, I like to bring some headwear insulation. So just, I find a Buff to be pretty versatile.
It’ll keep my ears warm and my head warm.
And then another nice thing about the Buff is that when you get the, if you happen to be out during the full moon, you can put it over your eyes as a sleep mask, and that’s better than waking up in the middle of the night wondering who the hell is putting a flashlight right in your eyes.
Food Storage and Bear Canisters in the High Sierra
The next layer down inside my pack are going to be a lot of food-related items.
So I’m going to take a Ziploc bag, gallon Ziploc bag. And this Ziploc bag is going to have the food that I’m eating today.
I keep this near the top of my pack. I usually put it kind of wrapped up in some of my extra clothing to insulate it.
The hot sun in the High Sierra will absolutely melt anything that could be melted. So especially things like chocolate.
Then I have food storage.
As soon as you enter the High Sierra, you are going to encounter some food storage regulations. And it’s important to know exactly where you are and what those regulations are.
So let me try to break them down for you.
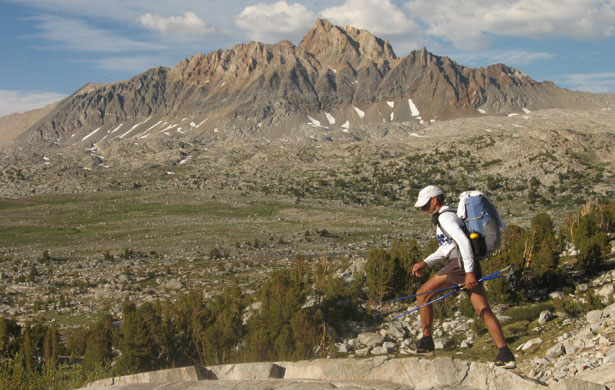

The Sierra High Route (SHR) is a 195-mile trekking route that runs north-south across the heart of the Sierra Nevada Range, through Sequoia-Kings Canyon National Park, John Muir Wilderness, Ansel Adams Wilderness, and Yosemite National Park. (Skurka)
Bear Canister Regulations in Sequoia, Kings Canyon, and Yosemite
If you are in Sequoia-Kings Canyon National Park, so if you’re on the Pacific Crest Trail, you’re going to enter Sequoia-Kings before you reach Mount Whitney.
The regulations are that you need an approved storage method everywhere throughout the park.
An approved storage method means either a hard-sided canister like this one, or they do allow throughout the park, you can, they do allow bear hangs.
So this is the Adotec bear-hanging bag. And then you’ll need a carabiner and maybe 50 feet of cord would be a little thin, maybe 75 feet of cord.
And Sequoia-Kings Canyon National Park allows you to hang food, but not everywhere.
So for example, if you are camping at Rae Lakes, you need a hard-sided food canister. If you’re, I believe, Dusy Basin off of Bishop Pass, you’re going to need a hard-sided canister.
As you continue further north, you get into Sierra National Forest or maybe Inyo National Forest. That would be the kind of that, just those jurisdictions to the north. And the regulations there are a little bit more lax.
You could hang your food. You could also use an Ursack, which is a soft stuff sack made out of like a very bite-resistant material. It’s like basically like pure Dyneema.
So those would be options for that section.
Throughout Yosemite National Park, no exceptions, must have a hard-sided bear canister.
BearVault BV ONE Adjustable Bear Canister
If you’re wondering what this bear canister is here, this is the, I think this is called the BV ONE from BearVault.
This is the smaller version. My understanding is that they are coming out with a larger version as well at some point.
And the nice thing about the ONE is that it collapses down. So as your food load, or as you eat through your food, your bear canister will get smaller and smaller and smaller, which is a nice change from your standard BearVaults or Bearikades where it doesn’t matter how much food you have in it. That space is always occupied by the bear canister.
And I have tried, in fact, I’m sure many other people try, you know, you try to put other things in that empty bear canister just to fill up that space.
But for whatever reason, it just seems like whenever you have a bear canister in your backpack, the size of your backpack never gets smaller. It’s like some sort of magic trick, really, just these bear canisters.
A quick note for the 2027 season, you definitely would want to double-check if the ONE is an approved food storage container in Yosemite or in Sequoia-Kings.
It sounds like there may be a moratorium on approving new food storage canisters.
The ONE has been approved by the IGBC, which is the Interagency Grizzly Bear Committee. And normally, like Yosemite and Sequoia-Kings, their policies mirror each other.
They accept the same canisters, but they don’t necessarily just accept any canister that’s been IGBC-approved.
A good case in point is that the Ursack, for example, has been approved by the IGBC, but it is not accepted. It’s not an acceptable food storage method in Yosemite or in Sequoia-Kings.
Backpacking Stove and Cooking Gear
Okay, so the last item related to food is going to be my stove.
I still prefer an alcohol stove for the High Sierra, and I would take one on the Pacific Crest Trail. I’m going to give you some caveats, though.
First is that the denatured alcohol is now difficult to find in California.
You still can, though, find if you go into a gas station, you’ll often find the bottle of, it’s ideally the yellow bottle of HEET, H-E-E-T, which is used as a gas-line antifreeze.
You could also use the red bottle. My understanding is that might be a little bit more toxic, but I don’t think it probably makes a huge difference if you’re in a well-ventilated space.
The reason I like the alcohol stoves are they’re quiet. I can carry just the right amount of fuel instead of being in that, like, do I need a four-ounce can? Do I need an eight-ounce can? Is a partially used eight-ounce can, is this going to be enough to get me to my next resupply?
And then when, on very short trips, the alcohol stove system is also lighter because you just don’t have that overhead weight of that canister, of like that metal canister, and the stove unit itself is also lighter.
This is the Kojin stove from Trail Designs. This weighs less than any canister stove, like an MSR PocketRocket, that you’ll find out there.
I totally get why a lot of thru-hikers and Pacific Crest Trail hikers would want to just go with a canister stove.
Those canisters are going to be available at most of the resupply points in any of the hostels. You’re going to find them in the hiker boxes.
I think you could go either way here.
I think I’m just sort of wedded for a long time to my alcohol stove, and I’m reluctant to give it up.
Alcohol Stove Safety
The other caveat I would add to the alcohol stove system is that there is a responsible-use issue here.
When you light this fuel during the daytime, it’s very difficult to actually see the flame.
So if you ever, for example, run out of fuel, like your stove goes out of fuel before your meal is cooked, don’t just pour more fuel in there.
What you want to do is put your hand slowly over the stove and make sure that it’s completely out.
I’ve done this before, where you pour and you accidentally light your fuel bottle on fire. It can be a real danger.
The other danger with the alcohol stoves is that you have this measuring cup and you can pour your fuel into the measuring cup, and then if you just pour it into your stove, inevitably like a drop or two of the fuel is going to end up somewhere around the stove and not in the stove itself.
So the best practice is that you measure out your fuel and then pour the fuel into your stove somewhere else besides where you’re going to cook.
And then at that point I would go ahead and light my stove and I put on top.
The danger is that if you pour some fuel around here by accident, light it, you’re going to light the ground on fire.
So you can easily end up with a ground fire or a forest debris fire if you’re not careful.
Spoon, Lighters, Cutting Board, and Knife
To eat, I prefer a spoon with a big ladle on it and a shortened handle.
This fits nicely into my ditty kit. And I prefer a plastic spoon over a metal spoon. It’s less sharp on the teeth.
It’s not cold to the touch. It doesn’t have like the nails-on-a-chalkboard sound when I’m eating out of my pot, which is my preference.
And then to light my stove, I prefer just a little Mini Bic lighter.
I usually carry, not I usually, I always carry two lighters with me.
I keep one in my ditty kit and I keep another in another part of my backpack. And by having two lighters, I make sure that if one gets wet, I always have a backup.
If I lose one, I have a backup.
Do not make the mistake of putting your lighter inside your pot. And this would apply for alcohol stoves and for canister stoves.
There’s enough, typically after a meal, there’s enough residual moisture inside of a pot that you can get your lighter wet enough that you’re going to struggle to start it.
So keep it in a dry place that’s not inside your pot.
I can’t forget these two items. This is part of my food kit as well.
This is a very inexpensive plastic cutting board that I chopped into a circle and it fits nicely inside of a bear canister.
I like to make kind of a more legitimate lunch. So typically say like cheese, salami, and crackers.
I also like to carry with me a real knife. So this is the Opinel, I think this is the No. 6, super-sharp knife and a very basic, very lightweight.
And it’s nice to have a real knife when you’re cutting real food like cheese or salami or butter.
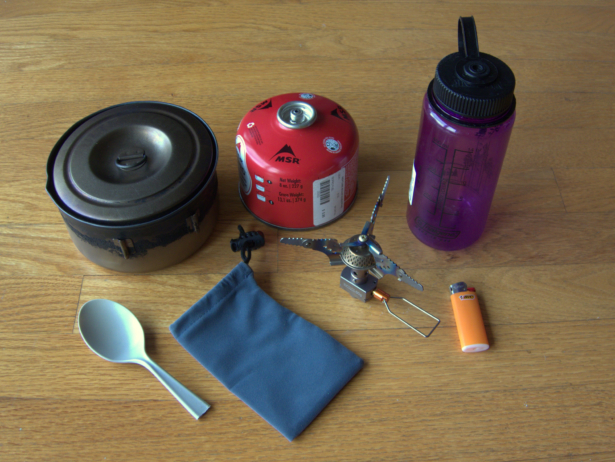

“My stove system for solo backpacking trips in the shoulder seasons, when I’m willing to carry a few extra ounces so that I can quickly heat up large amounts of water. With a larger pot and an additional eating container, mug, and utensil, this system would be suitable for couples, too.” (Skurka)
My PCT Shelter and Sleep System
This is the pack liner from the bottom of my backpack. Let’s take a look at what’s in it.
Again, these are going to be items that I do not need during the day. They are explicitly only for camp.
Let’s start by talking about the shelter.
Hyperlite Mountain Gear Mid Shelter
For all of the High Sierra trips that I’ve been doing recently, I’ve been using the Mid from HMG.
It weighs 20 ounces. It’s very storm-resistant. It’s bug-proof. It has a waterproof floor.
It’s a shelter that I can start using at the beginning of the backpacking season in June. And I can use it all the way through the end of the season at the end of September, beginning of October, even at times of the year where it’s overkill.
So for example, August, beginning of September, where the temperatures are still very mild and there are no bugs. So technically I don’t need bug protection.
And the forest floor is also pretty dry by that time of the year. So I don’t need a super-robust groundsheet.
It’s overkill for those conditions, but like, man, it’s only 20 ounces. So it’s just a shelter that works really well.
If you’re a thru-hiker, this is the sort of shelter that you could use from start to finish.
The other shelters in this category would be something like the Zpacks Duplex, which is a two-person version. They also have the Soloplex, the Altaplex.
Tent Stakes
With shelters like the HMG Mid and this larger category of shelters that rely on trekking poles to be pitched, all of these shelters are only as good as your weakest stake because they require tension to stay pitched.
So invest some weight in your stakes.
Personally, I take with me about eight stakes. These are the Easton nails. I think they’re seven inches long.
They weigh about two-thirds of an ounce. And I know that there are lighter-weight stakes out there. You can find them made out of carbon fiber. You can find titanium skewers.
But I just think for, you’re not talking about a lot of extra weight.
And the peace of mind that I get from stakes that aren’t going to pull out of the ground, and then I can pound into compacted ground with a granite rock, is well worth it to me.
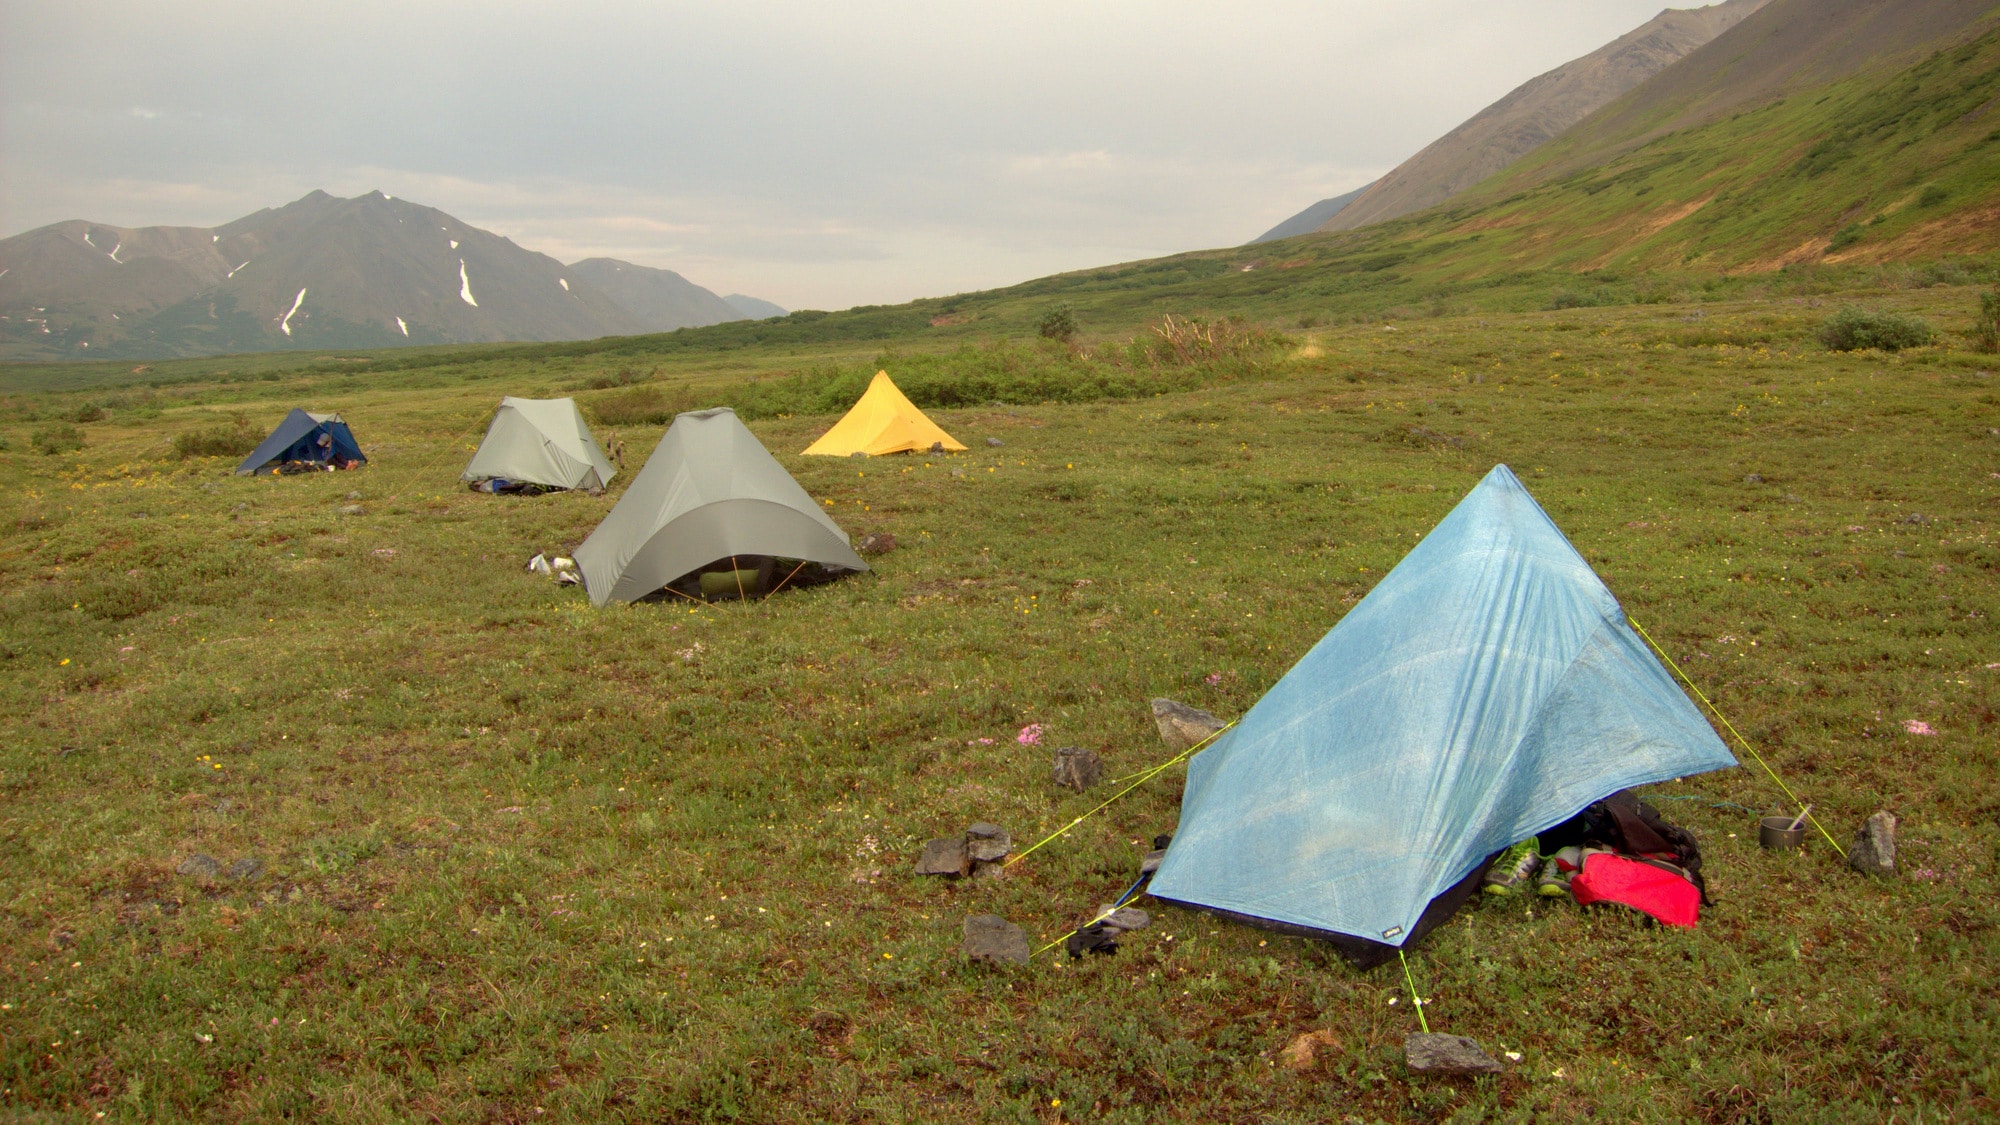

An assortment of single- and double-wall tents on the Alaskan tundra. (Skurka)
Western Mountaineering SummerLite Sleeping Bag
For my sleeping bag, last season I moved over to the Western Mountaineering SummerLite, which is a true mummy bag with a real hood.
So yeah, you heard it here first. I no longer use quilts.
When I first started backpacking 20, 25 years ago, quilts were a dramatic improvement over what was available at the time, just in terms of the warmth per weight.
But the traditional sleeping bag companies like Western caught up. They started using similarly lightweight shell fabrics. They also use the same super-high-quality down.
So I have found that just the quilts, they’re drafty. That’s what it comes down to.
And as I got older, I just was struggling like every time I kind of rolled over, you know, doing the nightly rotisserie action.
I just got sick and tired of that draft. So last season, I upgraded to a mummy bag.
It’s been fantastic. It’s rated to 32 degrees, which is a pretty conservative rating. It weighs 19 ounces.
I don’t see myself going back to quilts.
If I were starting the Pacific Crest Trail from Mexico, I think a 32-degree bag, that feels about right to me.
I know you’re in the desert for the first 700 miles, but you’re there in, you’re there in May or in April or maybe even March.
It’s not, it’s not particularly warm at that time of the year, especially at night. So I think having a bag that you can take below freezing, it would be, would give you some comfort. It would make sure that you’re sleeping well every night.
I think as you go further north, if you were going to use a bag, I think it would actually be north of the High Sierra.
You know, when you’re in like Northern California, when you’re in Oregon during like late July, August, during those like dog days of those hot days of summer.
I think at that point, maybe you could go with a lightweight bag that was more of a comfort rating, say like 40 degrees.
There’s an argument for just having a kit that is versatile, versatile enough to make it pretty much the entire trip where those like two or three ounces don’t warrant the hassle of sending stuff home and getting stuff in the mail or the extra expense of $400, $500, $600 for an entirely different sleep system.
So the deal with the comfort ratings, you know, this has improved a lot with the standard that they have now. Because you can get a little bit more apples-to-apples, but none of the quilts are rated according to that standard.
You tend to sleep warmer if you have a, if you’re like thicker-bodied and if you’re young and if you have a lot of muscle.
Therm-a-Rest NeoAir XLite Sleeping Pad
For a sleeping pad, back when I was young, I used to just go with closed-cell foam, but nowadays I have, like so many other people, upgraded to the Therm-a-Rest NeoAir XLite.
This for, boy, probably 15, maybe even 20 years now has been the gold standard for warmth to weight and comfort.
There are other pads out there that are warmer. There are pads out there that are lighter. There are pads out there that are more comfortable.
I’m not sure any of them have figured out how to get that exact, like this, this perfect intersection of comfort and warmth and weight.
If you’re young and you don’t have a lot of money, a closed-cell foam pad is fine.
It’s not as comfortable, but you’re young and they’re not going to deflate on you.
I do think that the air pads, they’re durable-ish, but boy, you’re asking a lot of an 11-ounce product that holds air every single night to make it through the length of a thru-hike.
So I would at least know that maybe my, the pad that I start with is not going to be the pad that I finish with.
And I would also make sure if I were on a thru-hike carrying a NeoAir XLite or similar, that I would have a patch kit and I would know how to use it.
And I would know how to find holes in my pad, particularly the slow leakers that get annoying night after night after night when you’re having to wake up two or three times to reinflate your pad.
Sea to Summit Pillow
In addition to the sleeping pad, I also carry with me a pillow.
This is a little two-and-a-half-ounce luxury. Maybe this is a three-ounce luxury.
This is one that I’ve used from Sea to Summit.
It’s pretty old at this point, but it’s kind of the right size and it’s the right, it’s like a nice comfortable fabric on top.
There are definitely lighter pillows. There are bigger pillows, but this one works pretty well for me.
Water Storage, Navigation, and Gear Accessibility
To finish up, let’s talk about some of the things that are on the outside of my pack.
These are items that I’m, that I intentionally keep on the outside because I want them accessible.
Water Bottles and Hydration
In my side pockets, I have, I just carry a one-liter, that’ll go in the Smartwater bottle.
Nowadays, instead of ingesting these microplastics, you can go with the commercial bottles that look like a Smartwater bottle. I’m thinking like the ones from CNOC.
In my back mesh pocket, I have with me a coffee cup.
I do like carrying a coffee cup. I find that my breakfasts are more efficient if I have one, because I can make hot water for both breakfast and coffee at the same time.
I have a Platy bottle. This is a two-and-a-half-liter Platy bottle. There are other options out there.
Water is abundant in the High Sierra. If you’ve been, if you have come through Southern California, you’ll never have an issue with water.
If you are in the desert, maybe you want two of these because for some of those longer stretches, maybe even three of these, if you’re hiking late in the year and the water
These are great for carrying large amounts of water. They don’t weigh a whole lot.
You’re going to want at least one of these, even in areas where water is abundant, because it allows you to fill up all of your capacity at the very end of the day, and then hike another hundred yards, 200 yards, 400 yards to your campsite.
And you’re not having to go back and forth to go get water for breakfast or for dinner.
Sunglasses Case, Paper Maps, and Compass
I carry it with me. I like to carry a sunglass case. I leave it in the outside pouch.
The sunglasses, as we talked about before, they’re a critical item for the Pacific Crest Trail. You’re going to be wearing them all the time.
You have something that’s going to protect your sunglasses. If your sunglasses were to go down, it’s going to be a pretty uncomfortable couple of days before you can get some replacements.
In my other side pocket, so if you’re a Pacific Crest Trail hiker, you’re not going to be carrying paper maps. You’re just going to be looking at your phone, following the FarOut app.
But if you are doing any of the other itineraries that are available to you in the Sierra, so suppose you’re doing a high route or you’re doing some kind of DIY itinerary, and still for all of my trips, I love to carry paper maps.
I find that, especially when you’re navigating off-trail, having your maps, it’s a custom map set printed out on 11-by-17 paper.
This just provides so much more topographical context about what I’m seeing versus looking at my phone with the six-inch screen.
The other nice thing about paper maps is that the contour interval never changes.
So unlike pinching and zooming, it can be a little difficult to do that terrain association where you’re trying to get your mind to start understanding how the proximity of contour lines on the map relate to the field and vice versa.
Dynamic contour lines, it can be difficult because that relationship is constantly changing.
But here on the map, it’s printed. I can very easily kind of tell what’s going on.
And then I also like to carry with me a magnetic compass.
I just have this compass girth-hitched to my shoulder strap.
For the Pacific Crest Trail thru-hiker, you’re not going to need a magnetic compass.
But for anyone who’s a little bit more old-school, it’s a nice thing to have in the High Sierra just to get your bearings, kind of understand where is north, and maybe occasionally take some bearings in places where you’re not on a trail or maybe where the snow is covering your trail.
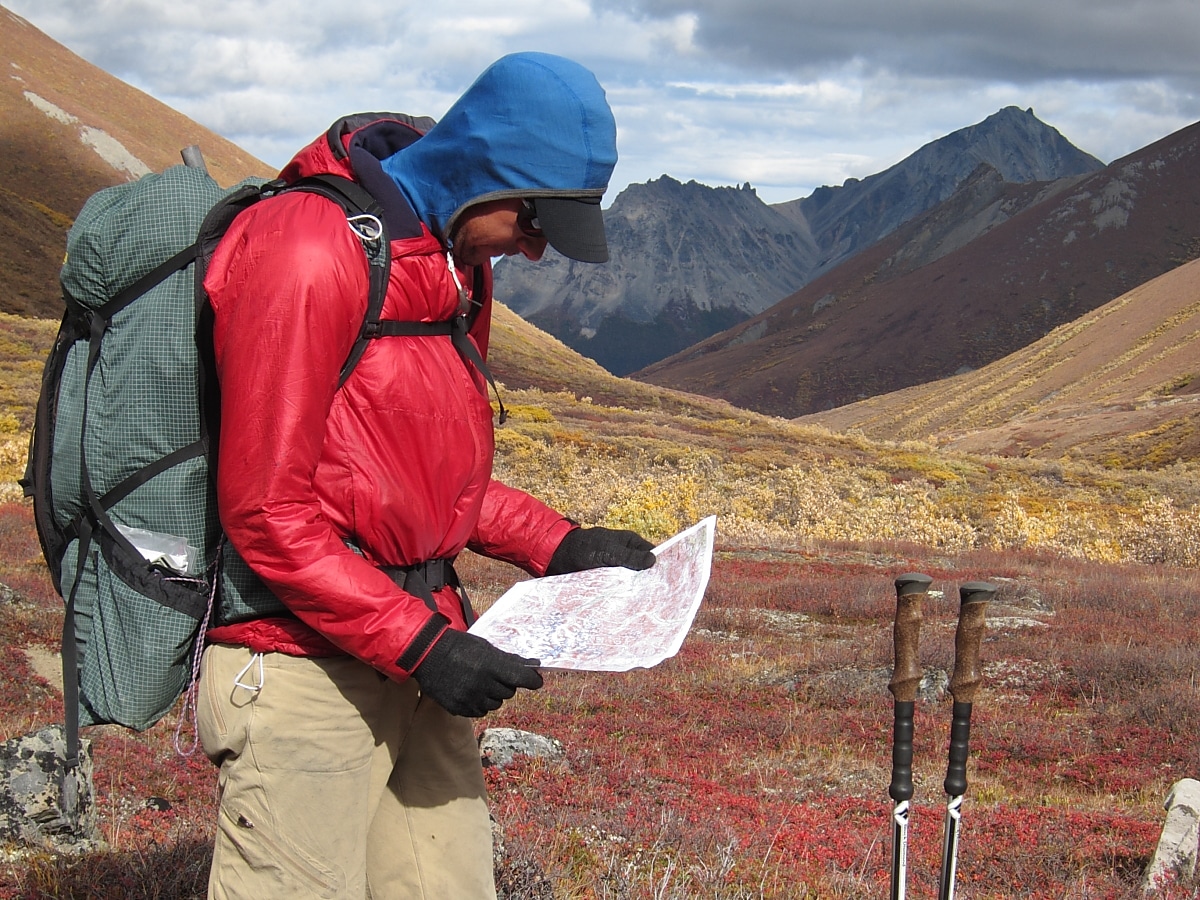

“Navigating around Alaska, the old-fashioned way, with an 11″x17″ USGS map (created with National Geographic TOPO! software) and a simple baseplate compass (located in my side pocket, attached.” (Skurka)
Water Purification and Personal Hygiene
Okay, and last but not least, I have my hip belt pockets in here.
I carry my water purification. I like to use Aquamira, and I bring with me a premix bottle.
The big problem with the Aquamira, we’ve used it in our guiding program for many years. It has an awesome track record.
It can purify large amounts of water very quickly, which is a great thing in a group setting or if you’re backpacking in the, where you might leave a water’s a lot of water to send through a Sawyer Squeeze
So the Aquamira will purify that water much more quickly than a manual filter.
The big problem with it, though, is that you have two shelf-stable solutions, part A, part B, and the recommended system is that you do seven drops of A and seven drops of B, and you let it sit in this mixing cap for five minutes, and then you can put that in your water, and that’s sort of a nuisance.
So what we do is we bring these premix bottles.
This is a 10-milliliter bottle, and what I can do with this bottle is I can do, in a group, I can actually do 80 drops of A and 80 drops of B, and this premix will be good for probably two, maybe even three days.
We try to use it up in 24 hours just to be careful.
It actually doesn’t reach its maximum potency until after about 90 minutes, so you’ve got like a super, super potent premix in here if you wait 90 minutes.
Sunscreen, Lip Balm, and Dr. Bronner’s Soap
Okay, last thing in here. Here we go. Just some personal hygiene and skin items.
I carry with me some sunscreen. I do like to have a dedicated lip balm, ideally with some sunscreen in it.
And then the last thing I have with me, this is a mini dropper bottle with Dr. Bronner’s soap.
I’m a big advocate of the backcountry bidet, so I don’t need to use any toilet paper at all, and the hand soap is the way to clean up and make sure that I’m not getting myself sick or anyone else in my group.
Yeah, we have an entire video, in fact the first video that we ever did with The Trek, dedicated to the backcountry bidet.
Go ahead and make sure to watch that. Maybe you’ll be a convert too.
In fact, I would actually, if you are a Pacific Crest Trail hiker, I would strongly encourage you to just move to the backcountry bidet.
With all of the use on the Pacific Crest Trail, toilet paper is a major problem, especially down in those desert sections where there just isn’t enough organic soil to break down the toilet paper.
So do your part in just converting to the backcountry bidet and not leaving a trace at all those high-impact campsites down there in SoCal.
Electronics, First Aid, and Toiletries
Last but not least, I have a couple of little ditty items.
So this is the one that has items I don’t need very often.
Power Bank, Headlamp, and Satellite Messenger
So I have my battery charger. You’re going to need 10,000 milliamp-hours, maybe 20,000 milliamp-hours, as well as your charging cables.
This is the Nitecore, I think it’s the NU27.
It’s light, it’s got a red light on it, it has a lockout, it’s bright enough to hike at night, although I don’t really like to hike at night.
I have with me a little bit of Dawn dish soap.
This is really nice for cleaning my sunglasses. I’m wearing my sunglasses all the time. They get covered in dust, they get covered in grease from my fingers, so having the ability to clean your sunglasses is really nice.
And the last thing I keep in that bag, this is my satellite messenger.
You could go with the Garmin inReach, and I would totally understand that.
I’ve been using the ZOLEO for a long time.
The big draw for me with the ZOLEO is that they give me a dedicated phone number, so if anyone needs to get hold of me, they can just text just like they would anyone else, as opposed to Garmin’s mind-blowingly complex obsolete system of needing to log into a MapShare page and sending someone a message through this MapShare page.
And then once that communication is established, then it’s a little bit more normal texting.
Foot Care, Toiletries, and First Aid
In my other ditty bag, these are mostly just little toiletry items.
I have with me another lighter. I have with me, this is GurneyGoo, which is for foot care, mostly for preventing skin maceration of my feet.
A little toothbrush. And then for toothpaste, I actually just use Dr. Bronner’s.
It’s an acquired taste, but it allows me to not have to bring toothpaste.
And the Dr. Bronner’s, a lot less of it is needed, probably like three drops minimum. And if you go with five drops, you’re like foaming at the mouth.
I bring some earplugs with me in case I’m sharing my campsite with some snorers.
I have some floss picks because I kind of get weirded out by putting my fingers in my mouth on backpacking trips.
And a bite guard because I’m one of those people. Surprise, surprise.
And then a little, this is just a pill case or pill bag with mostly just ibuprofen for pain reliever and a headache reducer.
I have some Tylenol in there and some Benadryl to help me sleep occasionally, or if I have some sort of allergic reaction.
I would also carry on a personal trip, I’d be carrying some antidiarrheal.
The one thing I don’t have in here, just because I didn’t bring it today, I would absolutely be carrying a little personal stock of Leukotape.
There’s another video we did about my entire first aid kit and also about foot care.
So definitely would be carrying some Leukotape in there.
What I Would Leave Behind on the Pacific Crest Trail
There’s a huge gap to go from day hiking to backpacking. You just need so much more gear for backpacking.
So I know it’s a lot, but hopefully it was helpful.
Let me just give you a couple of notes.
There’s some things that I’m not taking on the Pacific Crest Trail.
I’m not taking sleeping clothes because I’m not expecting to get rained on very often and probably not very heavily.
And I just don’t think it’s worth that like three-quarters of a pound to either sleep, to make sure that every night I’m sleeping dry.
Every day you should be washing your socks. Every day you should be trying to wash your feet.
Every other day you should be trying to do like a crotch-and-pits wash.
Your hiking shirt should get washed every like three days, four days at the most. It kind of depends on what kind of sweater you are.
Underwear is like for males every other day, maybe every third day. For women I think it’s more like socks where it should be like a daily wash.
I did in the video talk about just like the extra context and regulations around food storage.
That’s an important thing with this. Like the agencies, they try really hard to keep human-bear conflicts to a minimum and maybe prevent them outright.
The Park Service and the National Forest lands, the Forest Service have made huge strides in the last 20 years in that.
When you talk to old-school backpackers or old-timers from the High Sierra, they have just epic stories of crazy things that bears did to get human food.
And nowadays you really don’t have those sorts of stories anymore.
Adjusting Your PCT Gear List for Weather, Season, and Gender
There are some items that I would describe as being like conditions-dependent.
So rain pants and rain mitts. If I were on a thru-hike, I would just have it packed because I think you’re out there long enough that you’re going to see heavy enough rain that you do want rain pants, you do want rain mitts.
But if you’re doing more of like a shorter section hike, say like five days, maybe seven days, it’s something that you could leave behind.
The puffy jacket and the mid-layer in the summertime, so like July, maybe August, that could be an either-or item.
You might not need both, so it’d be a little bit weather-dependent.
And then also the shelter.
There are times of the year, especially like later in the summer, where you could get away with a lighter shelter.
It’s probably not going to rain on you and you’re not having bug pressure anymore.
So that might be the time of year where you just carry like a very small flat tarp or maybe an A-frame tarp.
Maybe go with a tarp and bivy. Maybe you just go with a tarp and groundsheet.
If you are a female, you’re going to, you will want to carry one extra pair of underwear.
Males, you can just carry one and you’re just washing and air-drying them. Or not air-drying, you’re actually wear-drying them, where you wash your underwear, you put your underwear back on, and you keep on hiking and it will dry out for you.
But for women, two pairs would be appropriate.
And then women also make sure to just add some items for your hair and menstrual products.
Early-Season PCT Gear for Snow Conditions
And then finally, I didn’t at all talk about early-season conditions.
So if you are a thru-hiker, you’re going to be going up through the High Sierra early in the season.
You might be there in May. You’re going to be there in the beginning of June.
If you’re like totally crazy, you might be there in April.
You’re going to need glacier glasses. You’re going to need an ice axe.
You’re going to need something like a sit pad. And you’d also want some puffy pants.
At that time of the year where it’s not backpacking, it’s almost a little bit more like mountaineering.
And if you catch it early enough, you’re kind of wondering where your skis are.
That’s a very different trip.
So I would recommend that you prepare accordingly, not just with what you’re carrying, but also just be prepared for those conditions.
It is not a normal three-season trip.
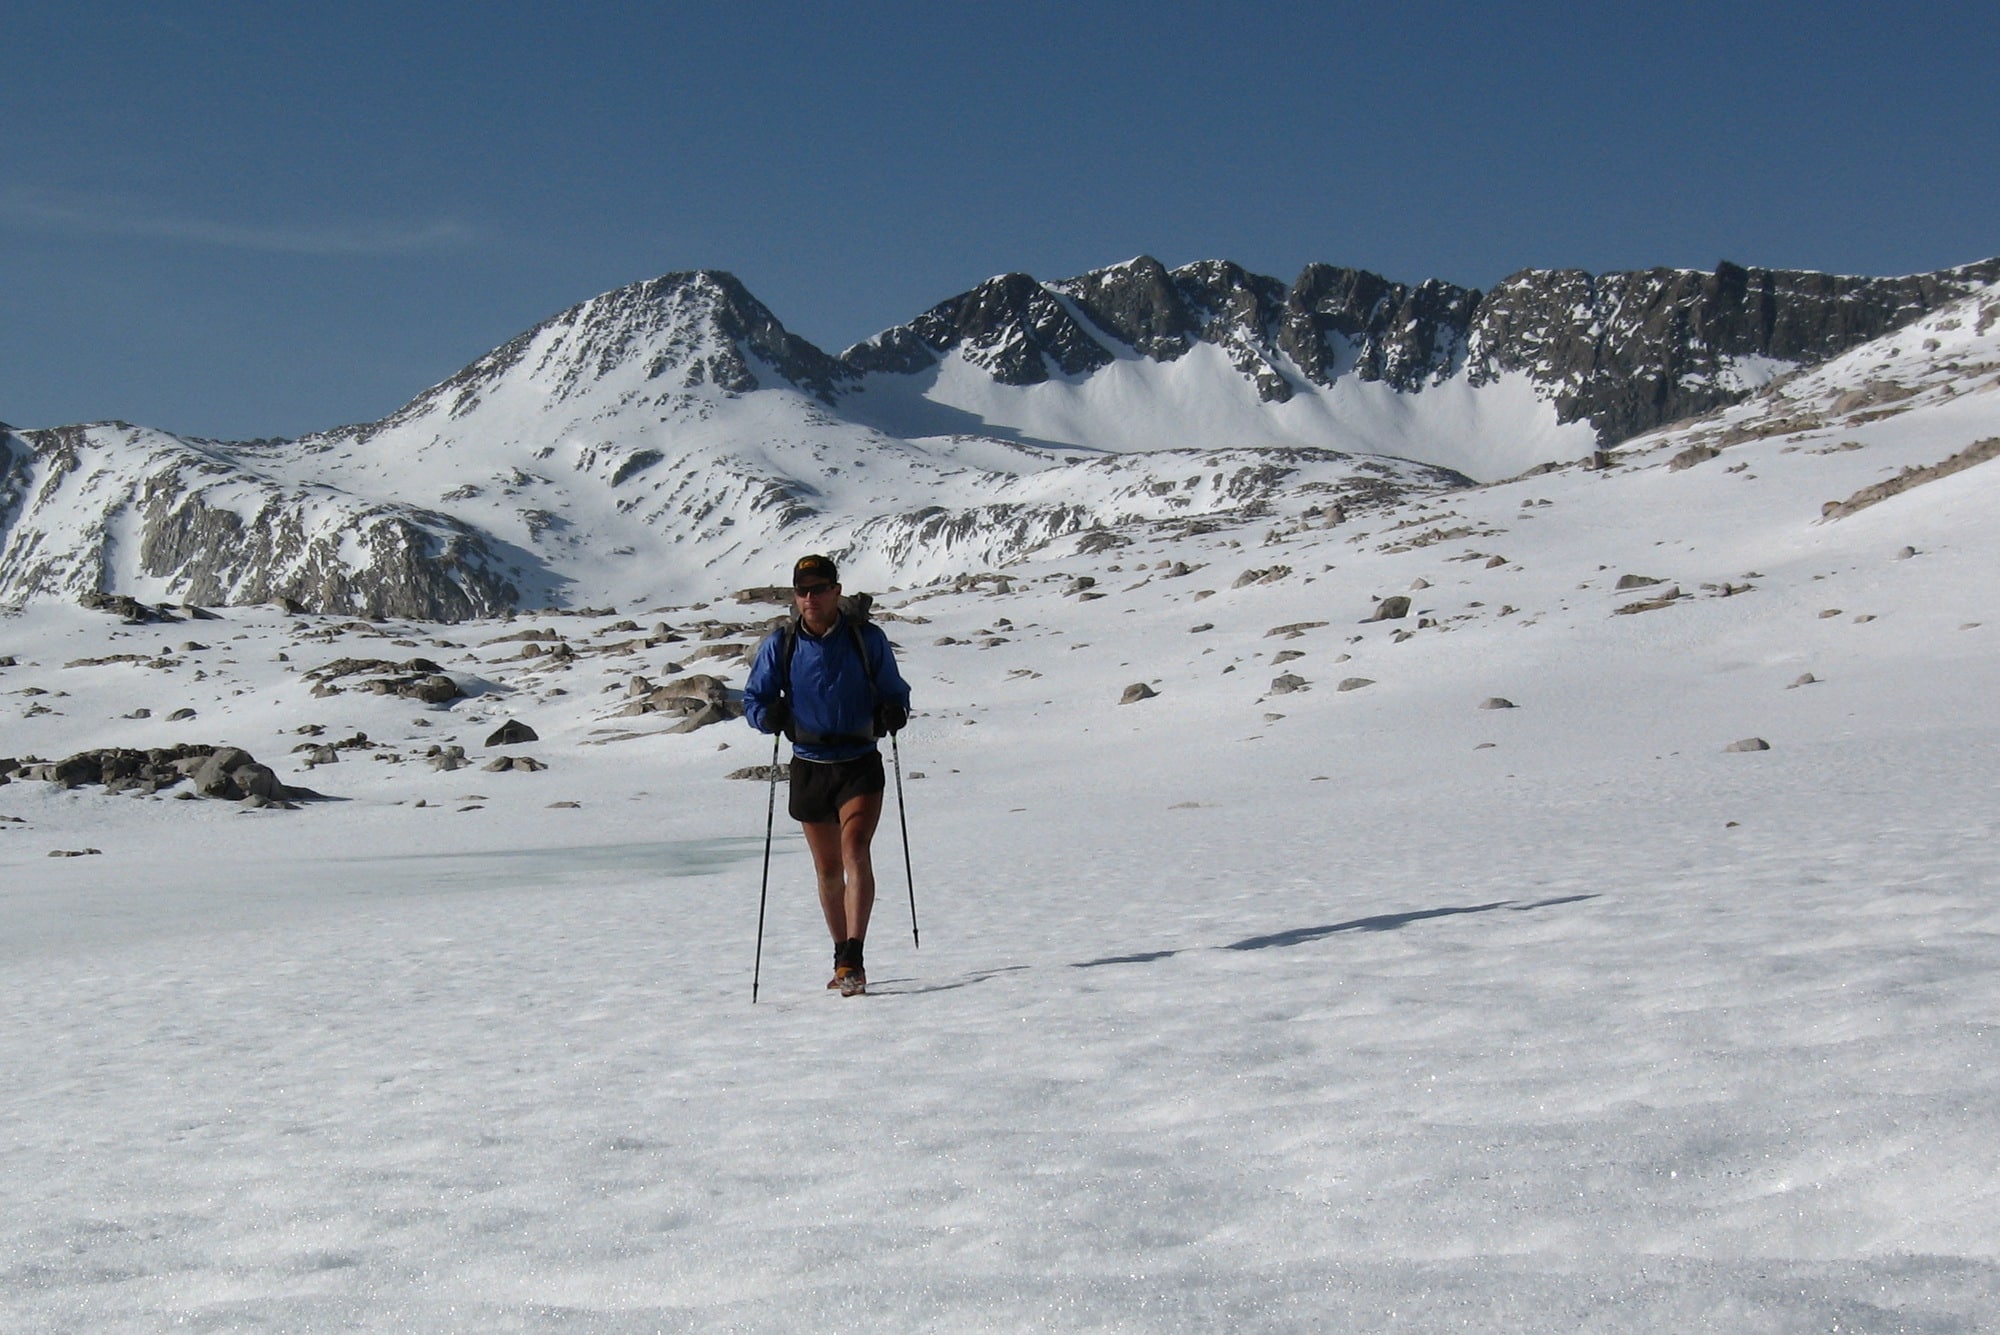

“Walking on concrete-hard snow below Muir Pass in mid-May, early in the morning. A few hours later in this same spot, I would have been postholing up to my waist.” (Skurka)
My Pacific Crest Trail Base Weight
With the bear canister, I would bet that my base weight, as I just kind of showed you, would be in like low teens.
You pull out that bear canister and you’re closer to 10.
And I’m certain that if a couple of you are watching this video and you’re like, what? 10? I can get it down to six.
And there certainly is the gear and the information out there to do that nowadays.
I think the reason that I’ve chosen the gear that I have is I want a kit that I can use for almost the entire hiking season and not have to swap things in and out a lot.
And the other thing I would say is that I’ve done that six-pound base weight thing.
And it’s really nice for hiking, but your margins are pretty thin.
I just don’t really have the tolerance at the age of 45 to be suffering that much. And often as a trip leader to be running things that thinly.
So by all means, if you can get it down to five or six pounds, all the more power to you.
But I think a lot of people are going to be more comfortable bumping it up a little bit.
It’s not that much extra weight. And that extra weight goes a long way in terms of your comfort and your margins.
Final Thoughts
Okay, we’re done. A couple of things.
If you live in the Denver metro area, we’d love you to join that live podcast. It’s going to be at Skylark Lounge, Saturday, December 5th. You can get tickets using the link down in the description.
We are opening registration for my guided trips on Monday, December 7th, if you’re interested in joining us in one of our locations.
And finally, last thing, please like and subscribe.
And I’ll see you next week, Monday at noon Mountain Time for the next episode.
Thanks.
Disclosure: Some links above are affiliate links. If you purchase through them, The Trek may earn a commission at no additional cost to you. Thanks for supporting the channel!


This website contains affiliate links, which means The Trek may receive a percentage of any product or service you purchase using the links in the articles or advertisements. The buyer pays the same price as they would otherwise, and your purchase helps to support The Trek’s ongoing goal to serve you quality backpacking advice and information. Thanks for your support!
To learn more, please visit the About This Site page.
Nov 2nd : The EditorsAuthor Page
The Editors’s Bio
We are the word nerds of The Trek who want nothing more than to infuse some hiking and backpacking joy into your day.